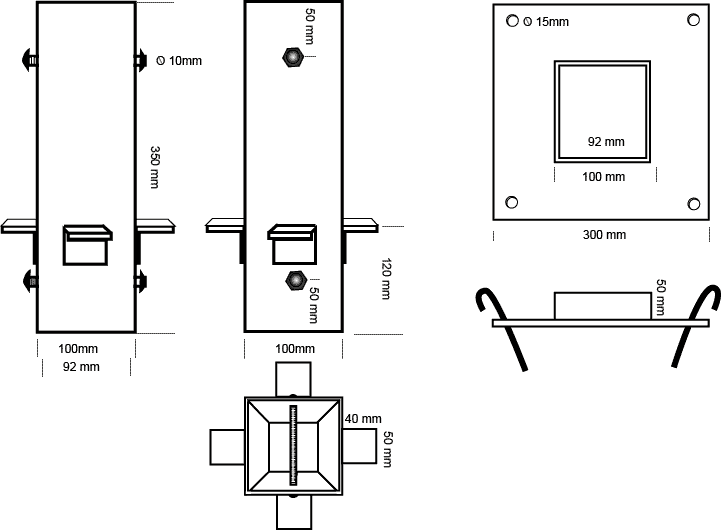
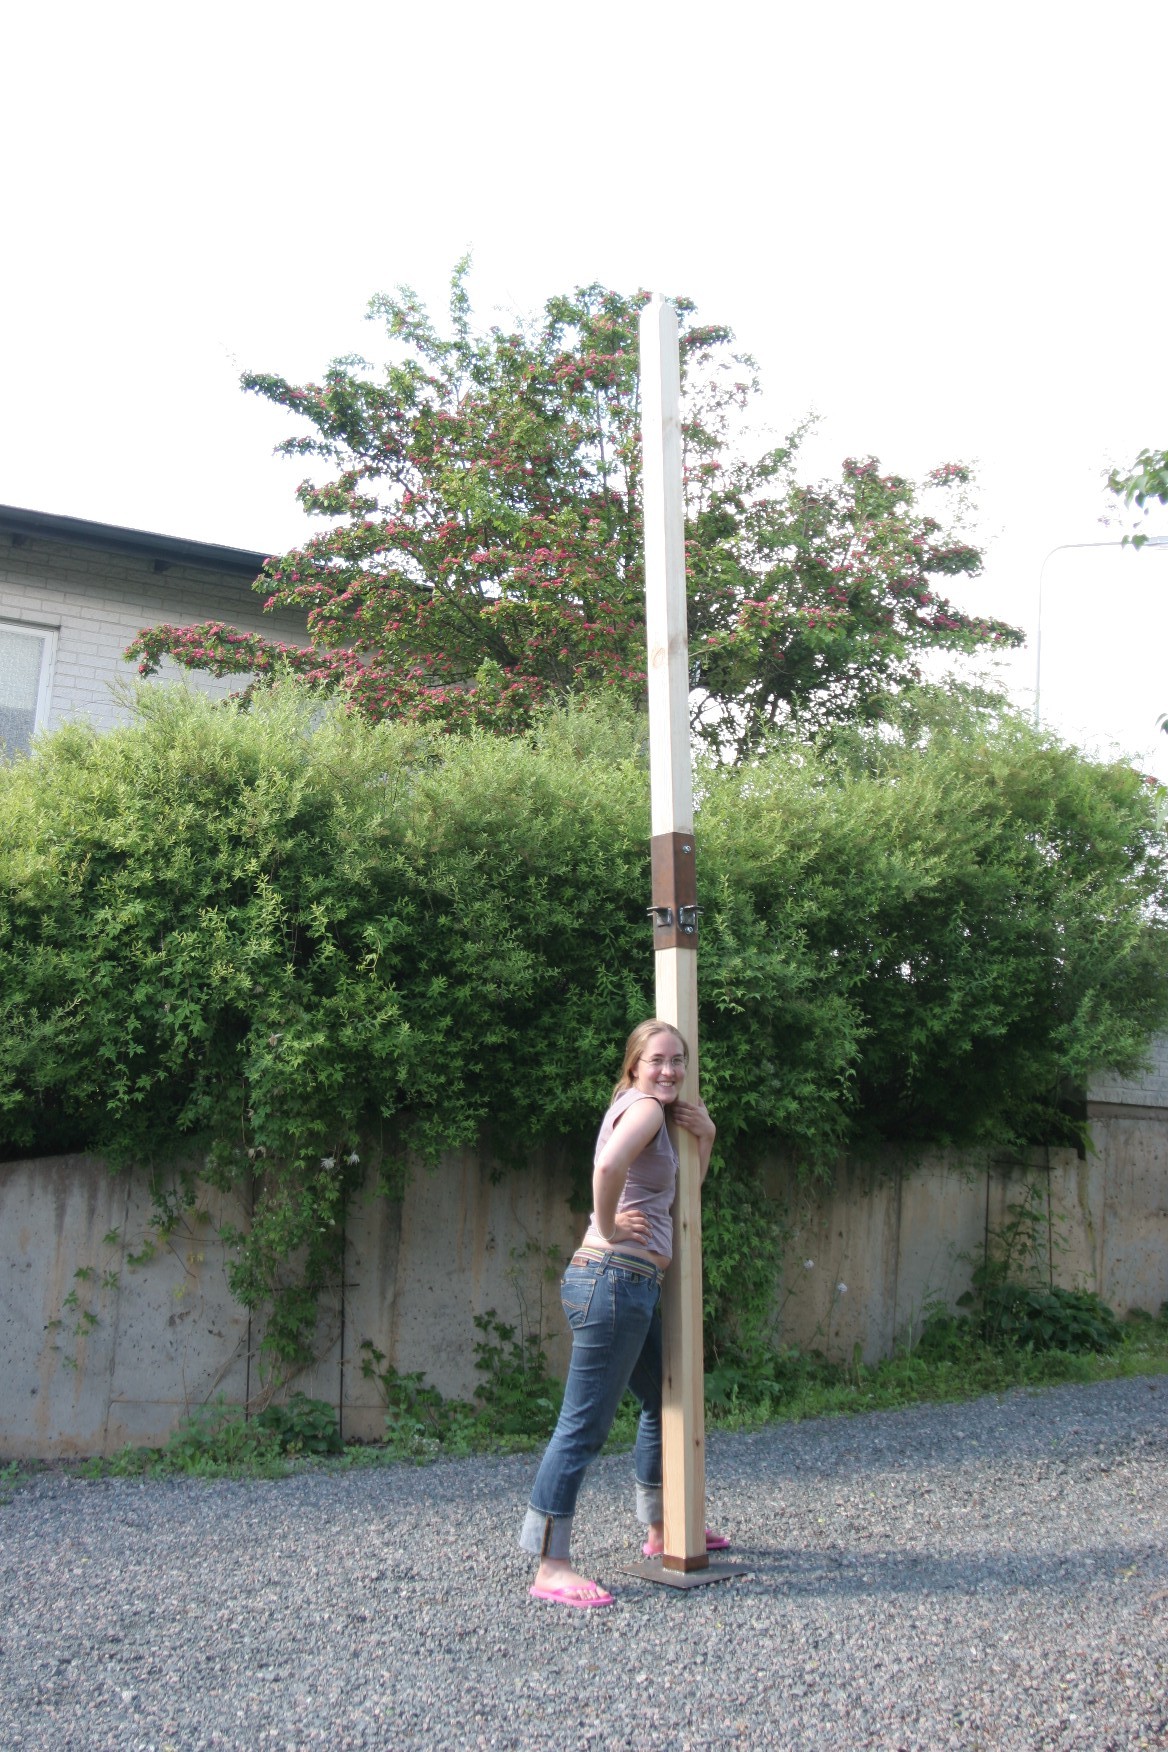
First make the iron-hubholder, to hold the centerpole uppright and holds the two centerpolehalfs together. It’s practical to make a pole foot at the same time. A polefoot is a good thing to have when you are not allowed to dig a hole on camp and it makes it easy to transport. If you don’t make a polefoot, make the lower half centerpole 30 to 50 cm longer. Make also the 12 large tent pegs at the same time and then paint or burn everything in linen oil, to prevent rust.
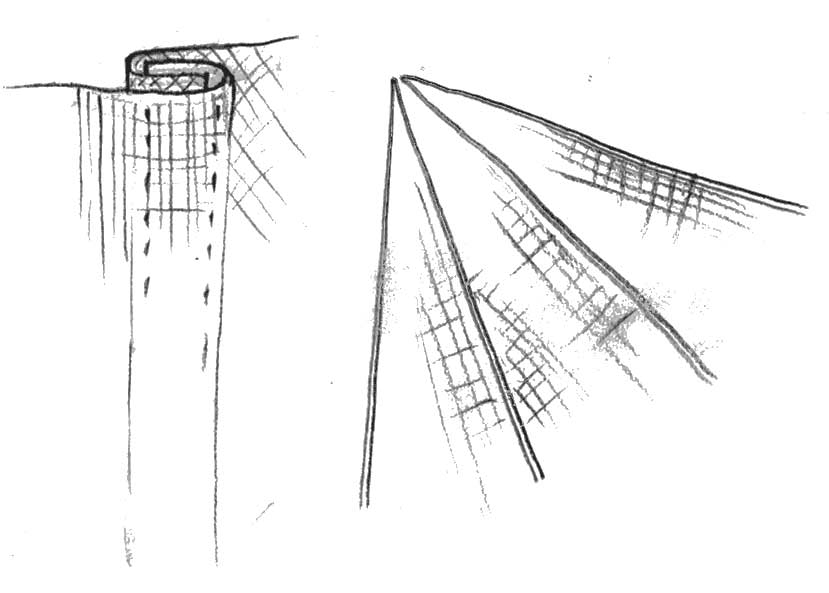
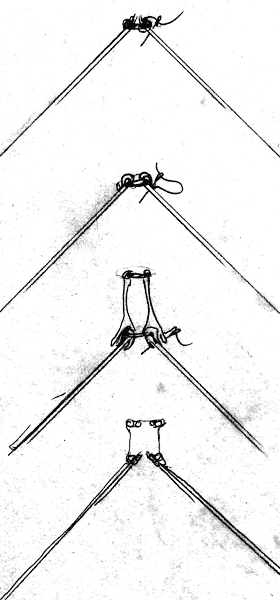
Shape the centerpoles together like an “L” form,
make sure it fitts perfectly in the hubholder. Drill the two holes through
the hupholder, the poles and out again
through the hubholder and screw them together. Measure
from where you think the hubcenter will be,
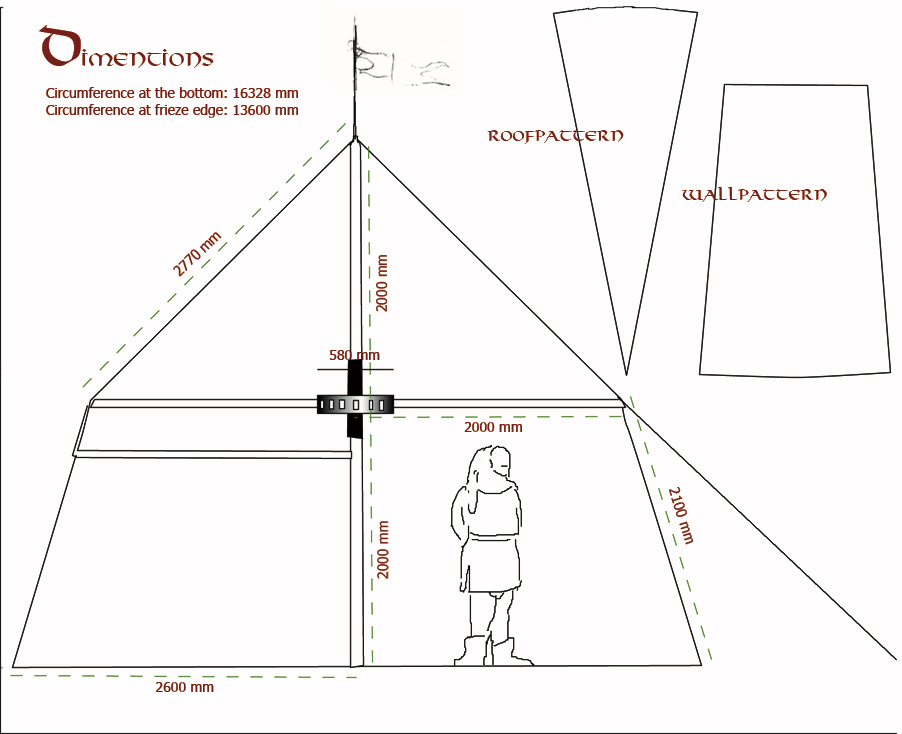
2 m up and 2 m down, on the centerpoles. Downwards just cut the rest of very
straight!! And on the top, cut the pole 8cm upwards
(208cm from the hubcenter).
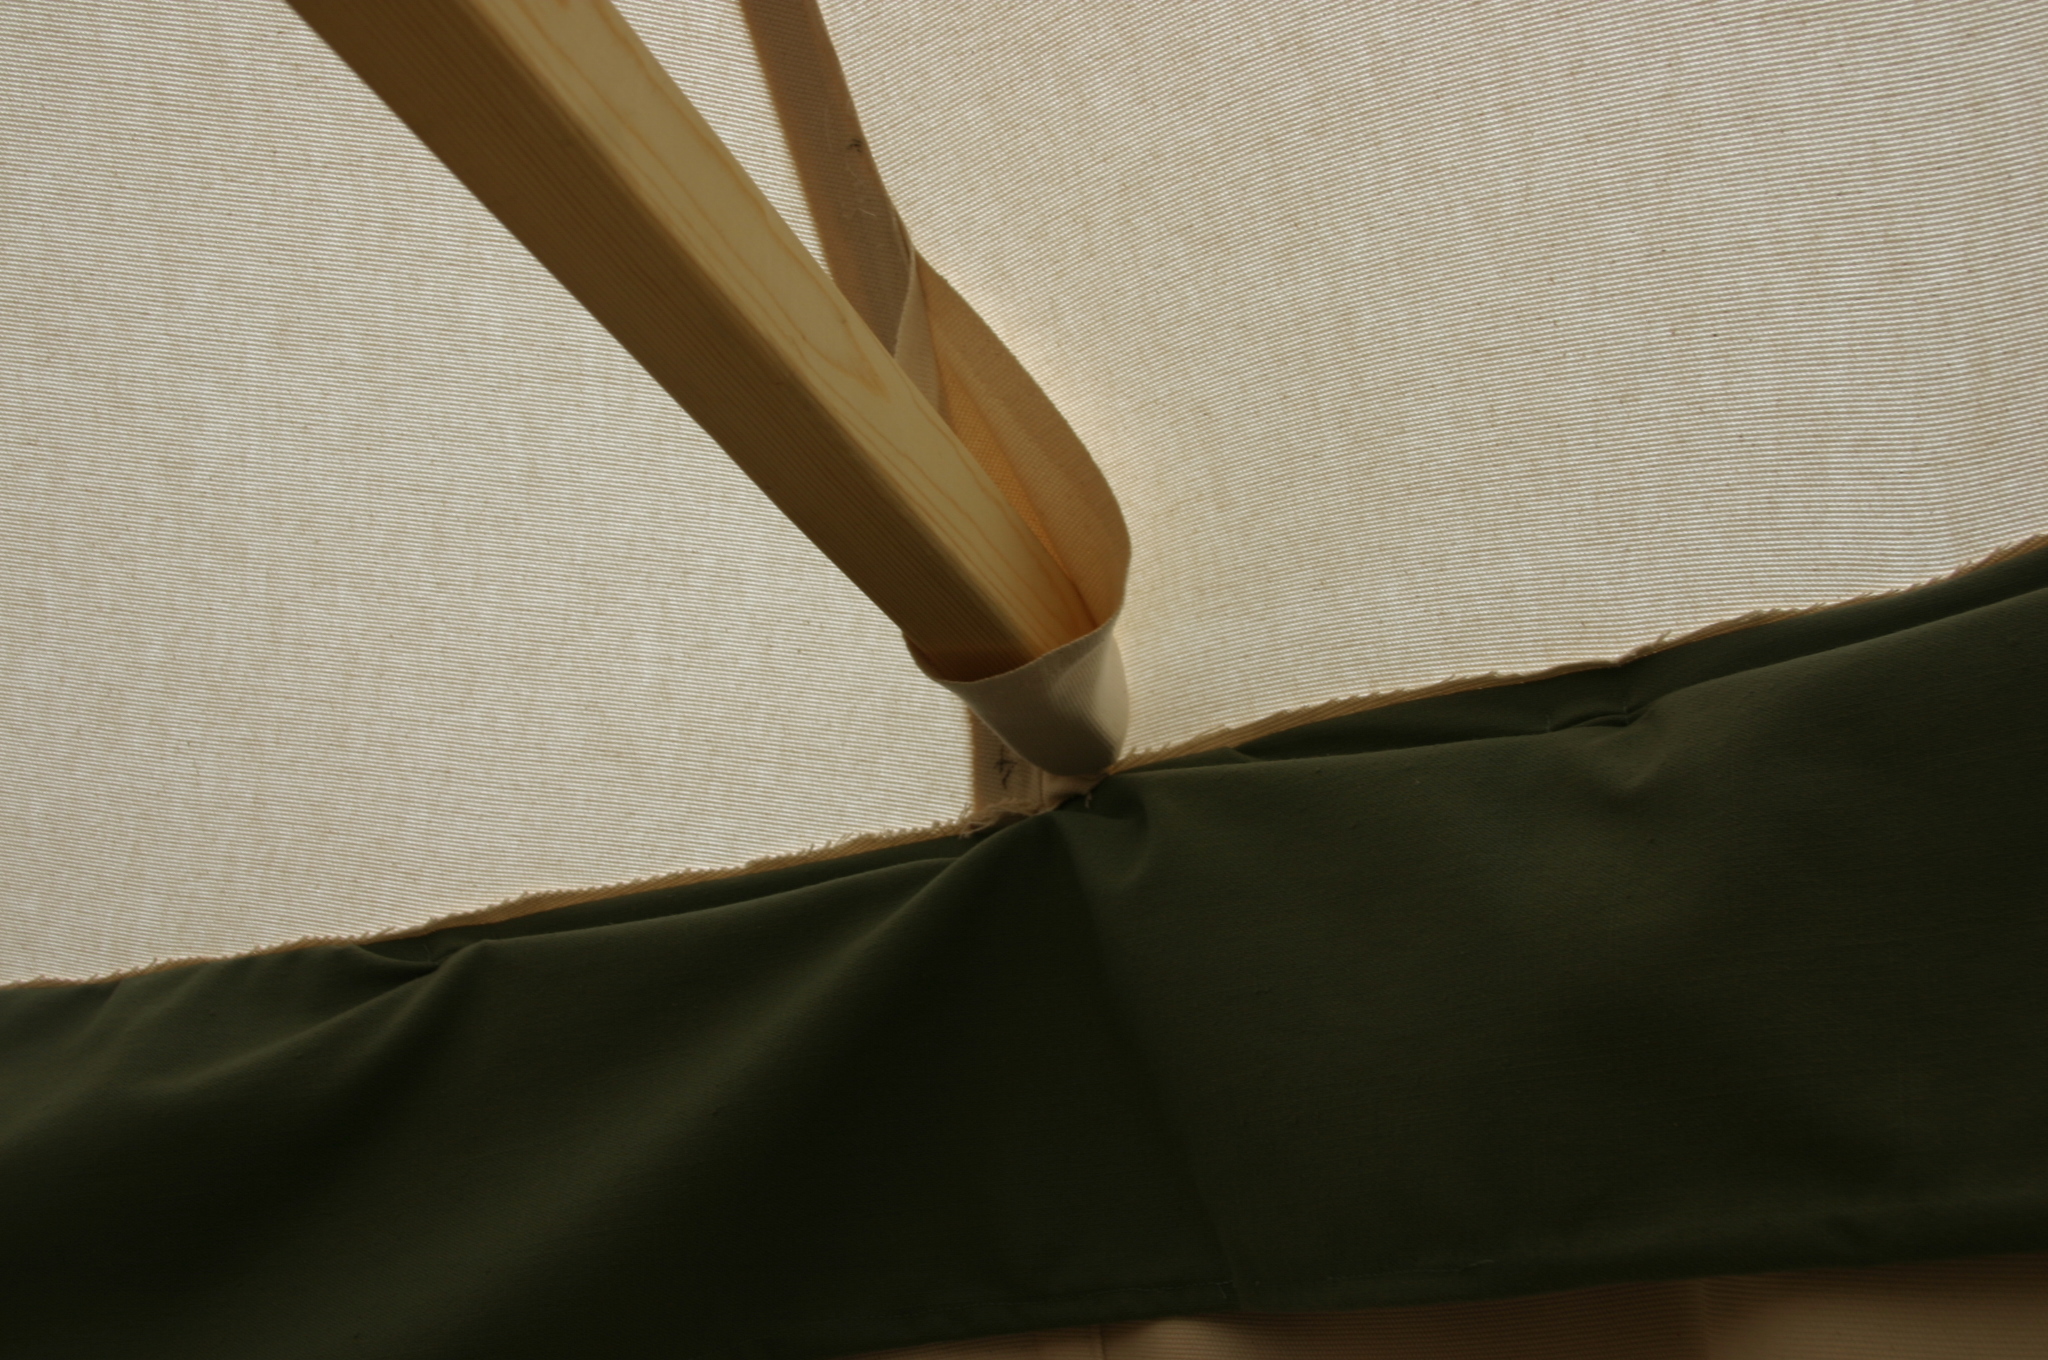
Shape this extra wood on the top end to a narrow, short pole only 6-7 cm in
diameter. Carve and polish the rough corners underneath to a smooth shape,
so the tent canvas can rest there without getting damaged. The extra top
goes though the roof and keeps it in place, the top is also the spear
holder, just drill an 8 mm hole downwards and polish and oil al the
wood details.
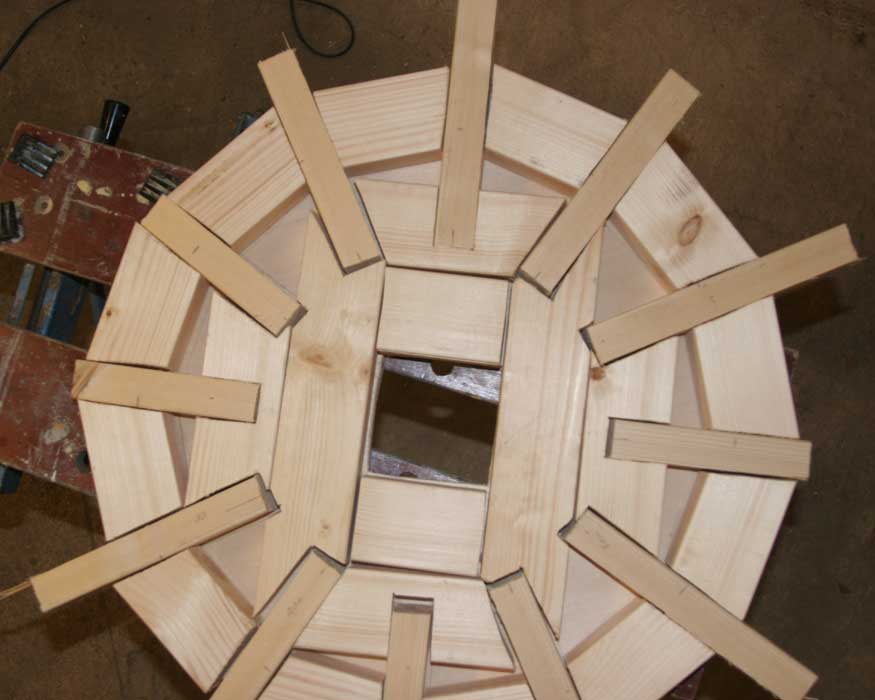
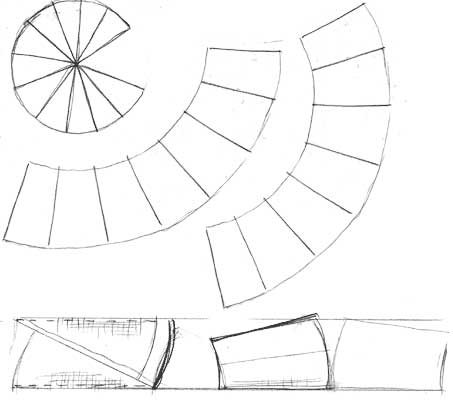
To make the hub you need 12 proof-pieces in a length of 30 cm, of the spoke material. Measure and draw exactly 12 equal cake pieces on one of the plywood circles and place the proof pieces like the numbers of the clock. Draw the positions on the plywood, of the 12 spokes and the iron hubholder in the centre. Cut out the wooden pieces to fill the rest, the pieces must be 4,5 cm high as the spokes.
Glue the pieces to the plywood and without gluing the other plywoodcirkle put it on top and press it during the night. After drying, take the unglued circle off and make a pattern where to screw or nail the pieces, use a transparent paper.
Now use the pattern on the outside of the plywood circle and mark the positions of the screws. Drill with a smaller drill before screwing in the screws. The medieval people didn’t have screws so either you hide the screwheads by drilling a bit in the holes with a wider drill and putty on top of the screwheads. Or you can do the medieval way, with smith nails.
Close the hub with the other circle, glue it on and use the pattern again for the positions of the screws/nails. Be sure not to place the new screws/nails on top of the others.
When the hub is dry, carve and cut it in shape. We painted it to look like the other wooden material.

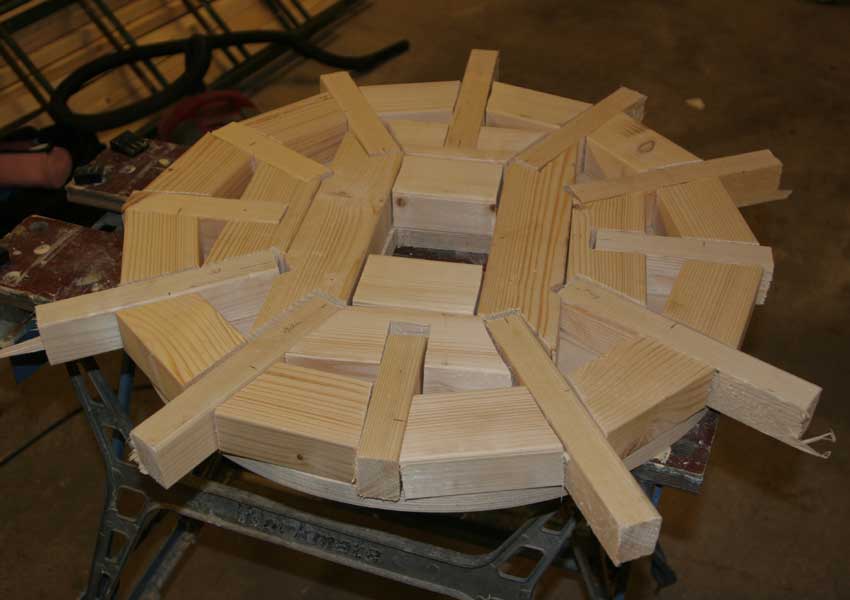
Now its time to make the 12 spokes. First mark the hub holes with a number from 1 to 12. Fit the spoke ends into the holes where the best fit is. Mark the spokes with the number of the fitting hole in the hub. Be sure the spokes are pulled in as long as it goes and measure the length from the hub centre and outwards to 2 m. Cut the spokes and carve and polish the out ends to a smooth rounded shape. Don’t forget to oil the details.
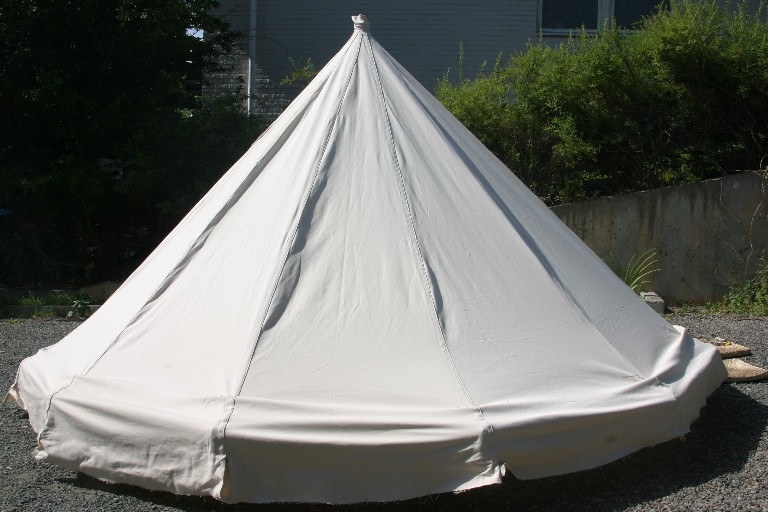
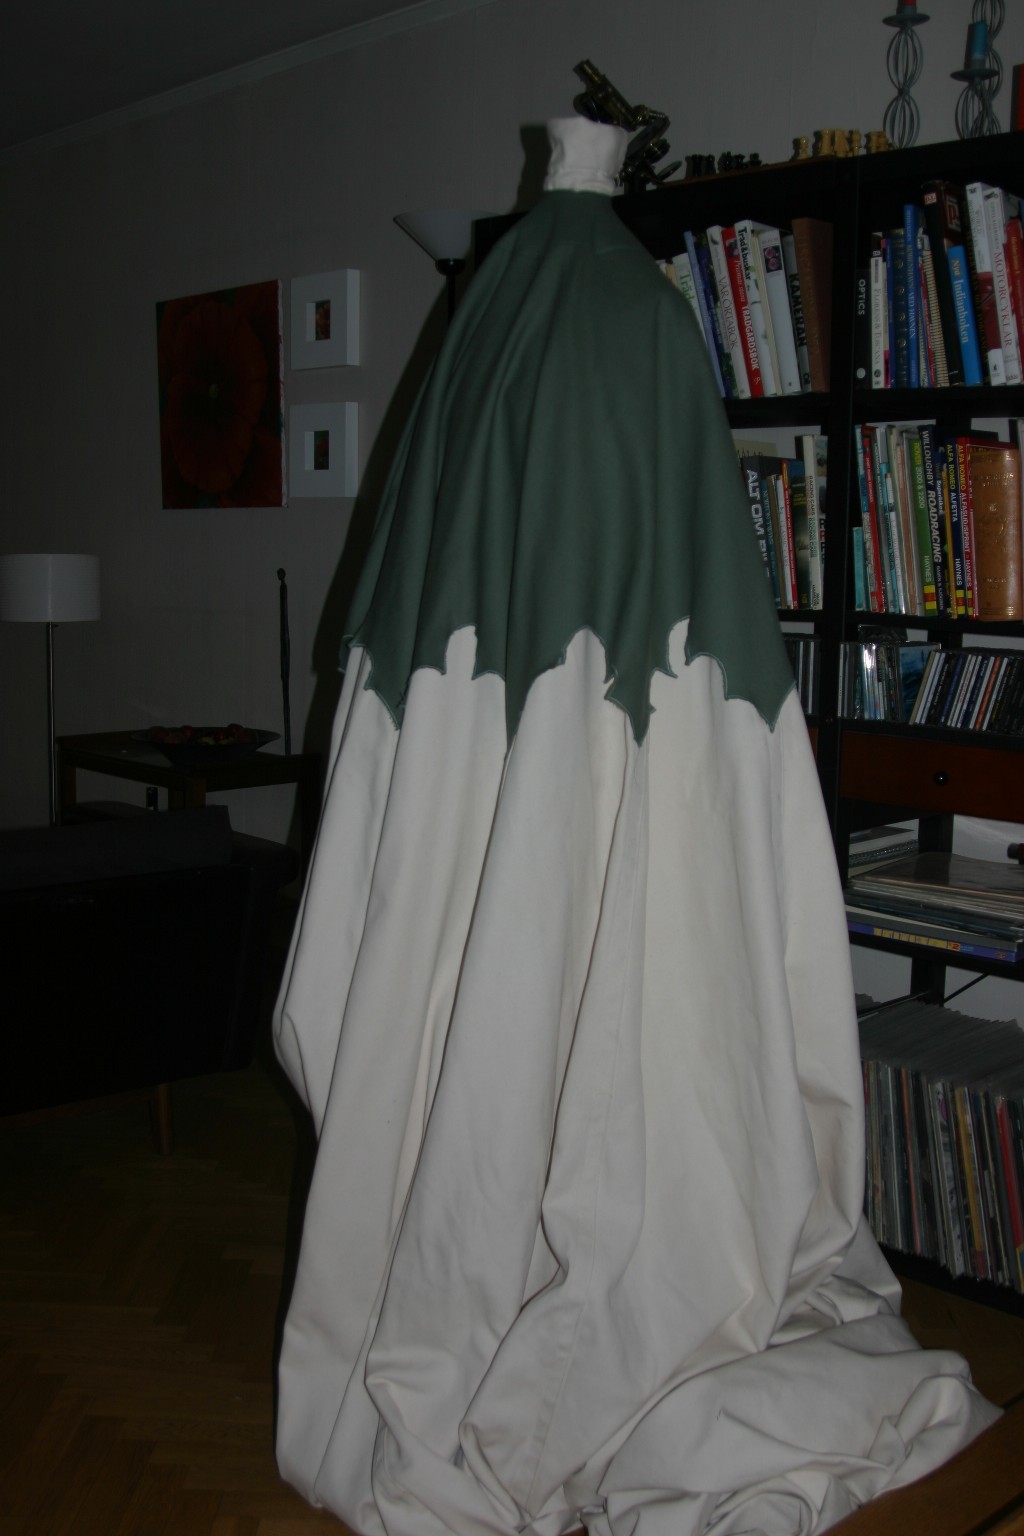
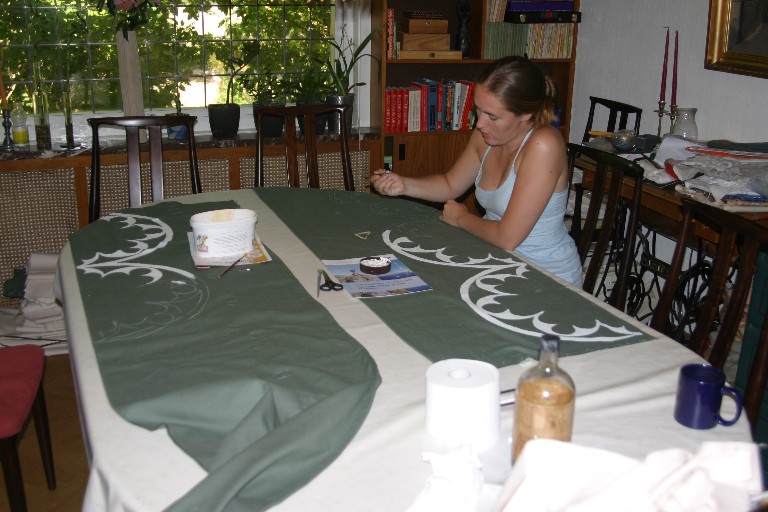
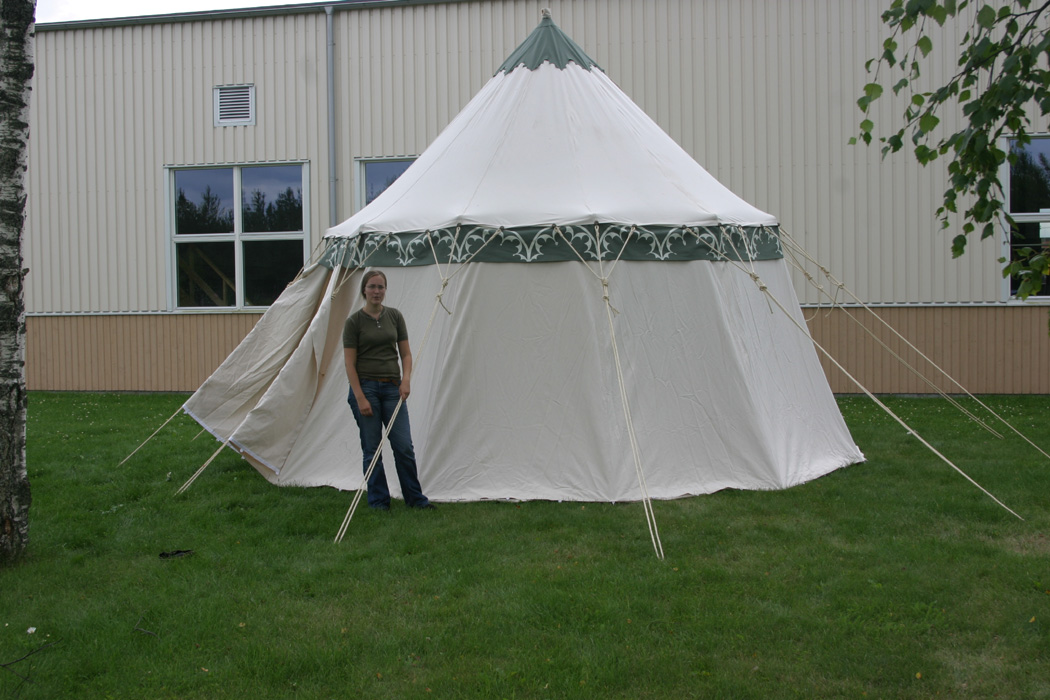
The pattern of the pavilion canvas can be measured at this time. Take a rope and some ducktape, measure the circumference by taping the rope at the spoke ends and pull tight. Divide in 12 parts and the measure should be about 107 cm. Measure also the length from one spoke end up to the top and down to the opposite spoke end. Divide in 2 and the measure shall be about 270 cm.
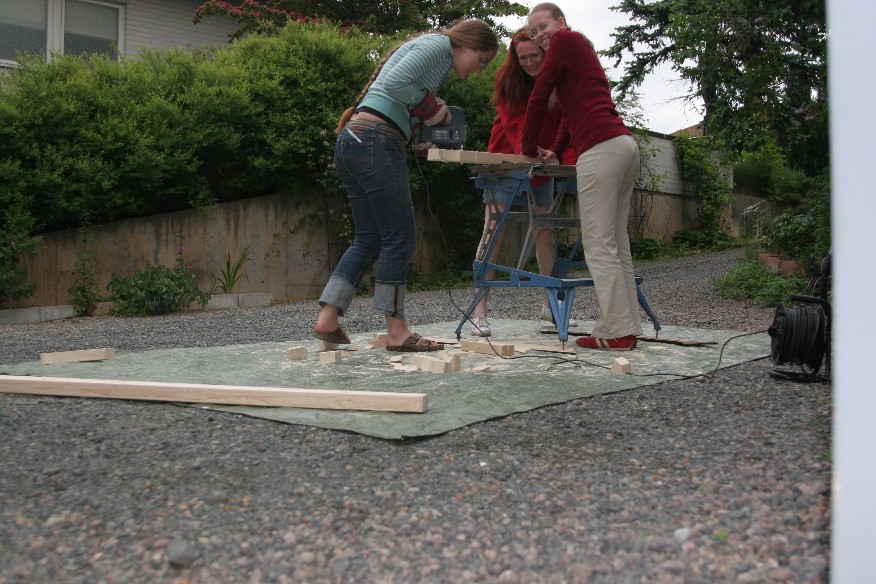
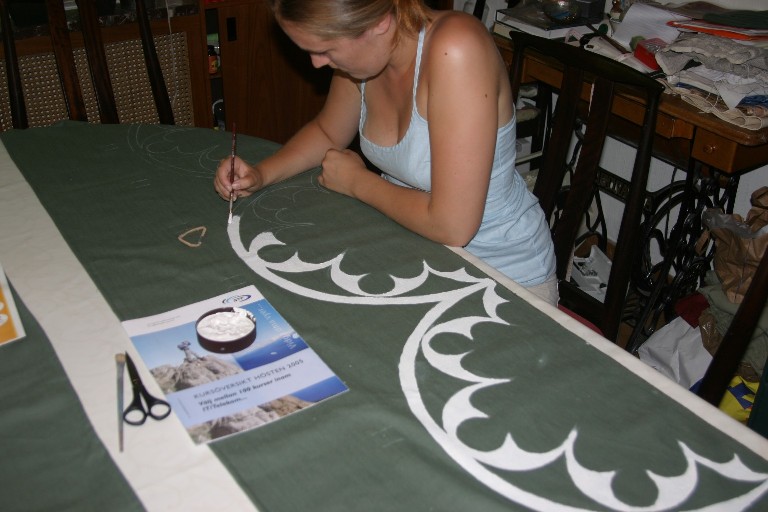
The construction is now done and the sewing remains. Make a paper pattern for a roof piece. Cut the 12 roof pieces with seem space and one side with the straight edge intact. Now you can make the hatch in the rooftop, ( description last on this page). Sew up the pieces one at a time with straight edge to slanting. It will provide a strong and smooth surface. Needle the seam together and use jeans seam.
The last piece can give some problem, if you sew it on the machine, do this: Sew the seams from the middle towards the top, and then the rest from the roof bottom up to the middle. Sew 12 pockets for the spokes.
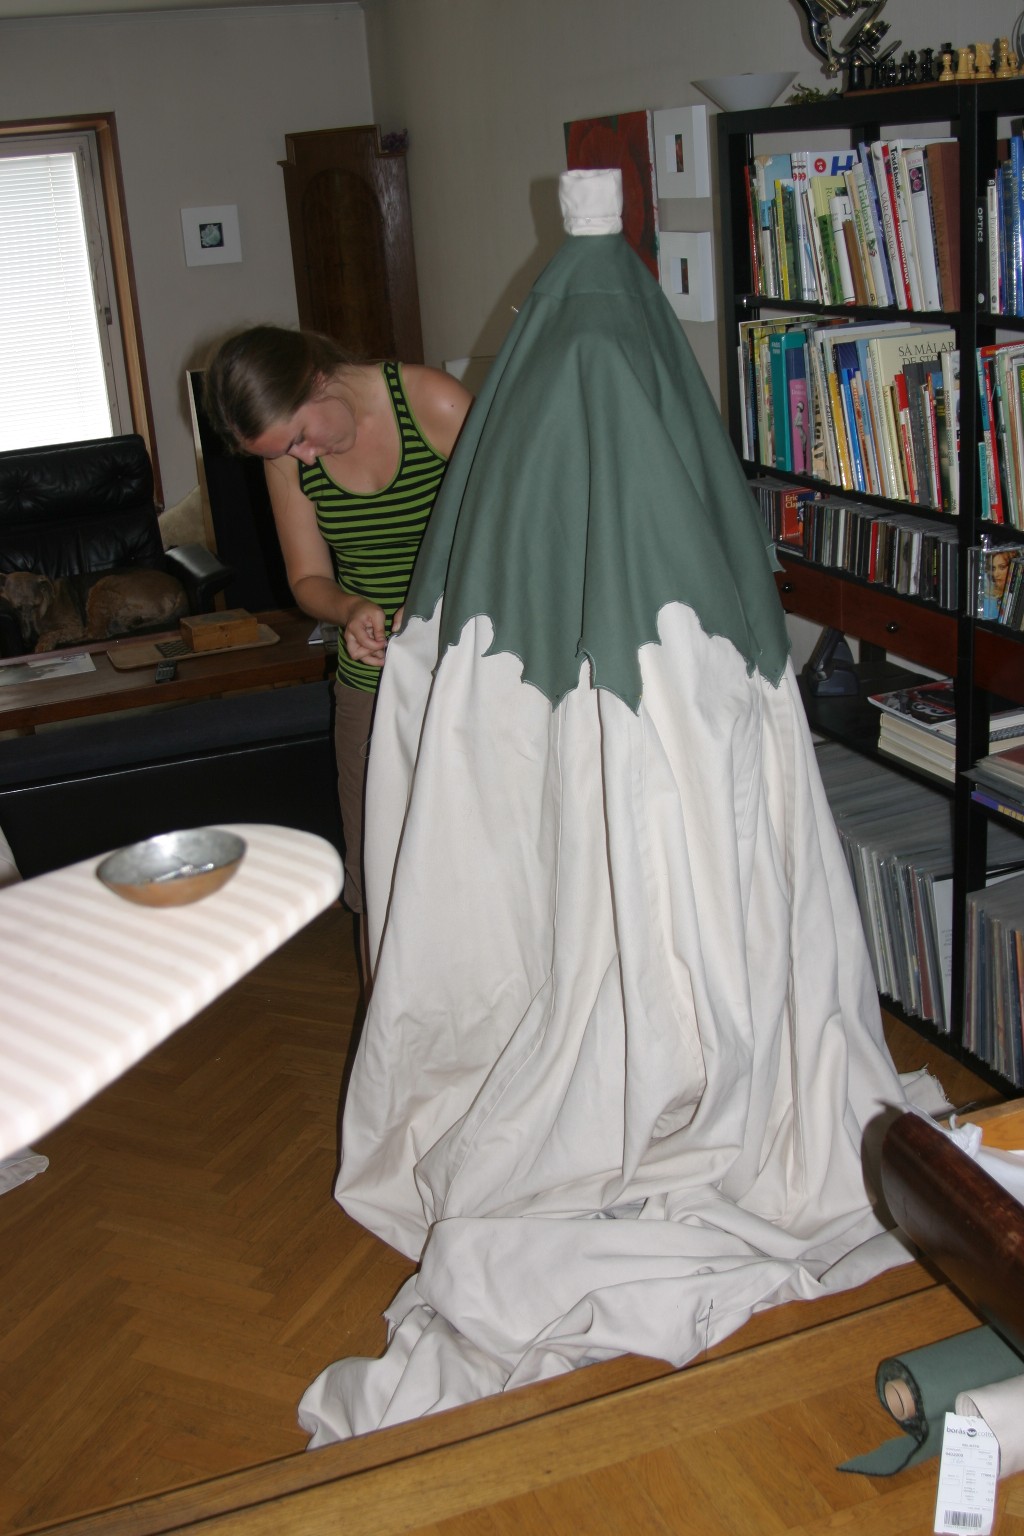
Try the roof on the construction, correct the faults. Hand sew with a strong tread (not carefully because later on you will remove them), the seams and the pockets together, while someone is pulling hard in the seam.
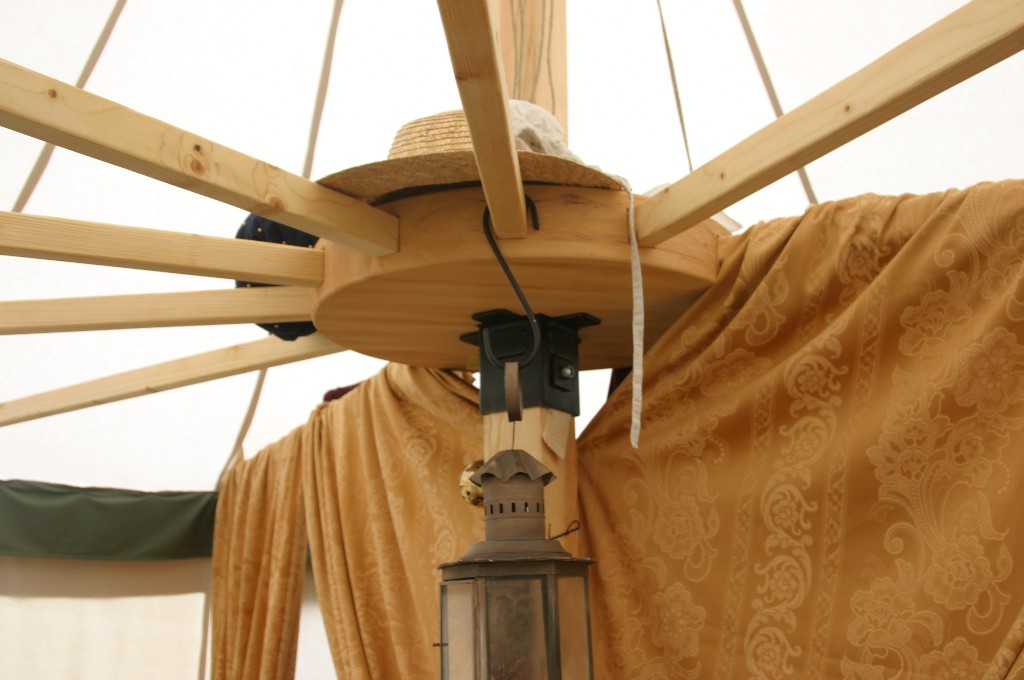
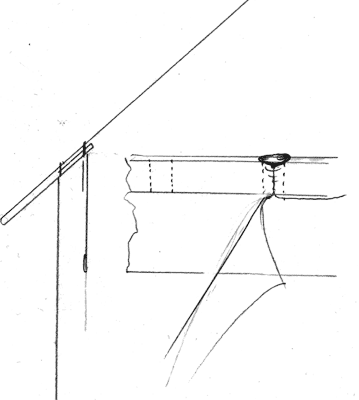
Take the roof of, and finish the rooftop with a reinforced circular piece, 35 cm in diameter in the inside of the pavilion. Sew one ring on, laying on the centre and roll the cloth back over the ring, sew the edge into place. Make a tube of cloth 20 cm x 8 cm in diameter, put the other ring on the tube and turn it over it, so the ring will be hidden inside it. Sew the both tube-ends on to the rooftop centre nicely, also with the first ring inside the tube.
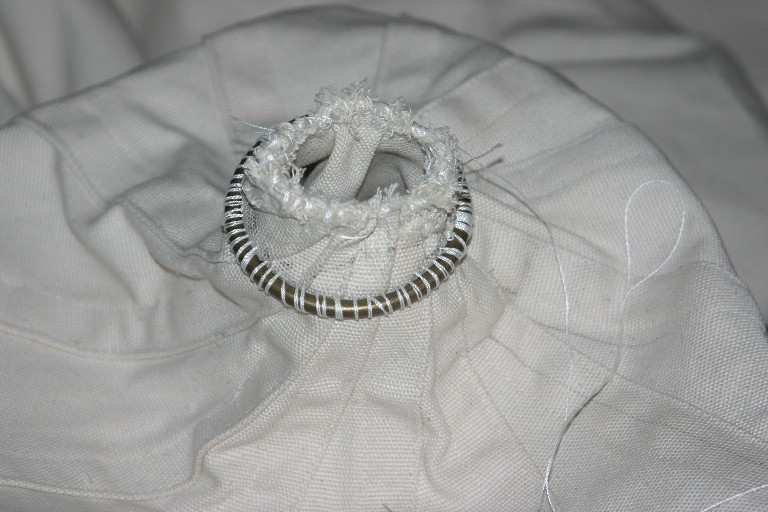
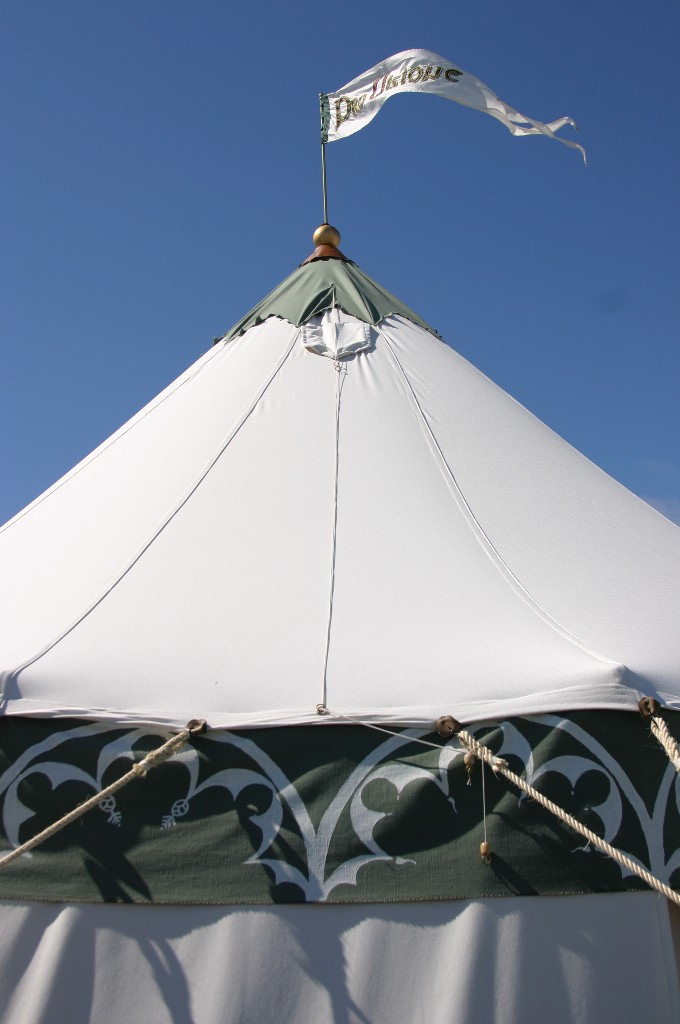
It’s now the decoration cap, if you want one, is mounted. Sew it on the tube together with the lowest ring and fixate the edges with sewing some stitches on the 6 or 12 seams of the roof, this will hold the cape in place.
Measure the position of the 12 pockets from the top to the pocket. Remove them and find the medium position for the pockets by calculating al the positions, take the whole sum and divide it to 12, shorten the result with 1cm nearer the rooftop. Sew the pockets carefully on again.
Try the roof on the construction again, it shall be hard to get the spokes
in the pockets,. (I almost break my fingers every time). Give the pockets
and the spokes the same number.
To prevent a twisting seam on the roof
edge, hem the roof with repeated seams
at least 3 parallel with 2 cm space between. Don’t forget to measure the
medium length of the wall pieces. It should be around 208 cm.

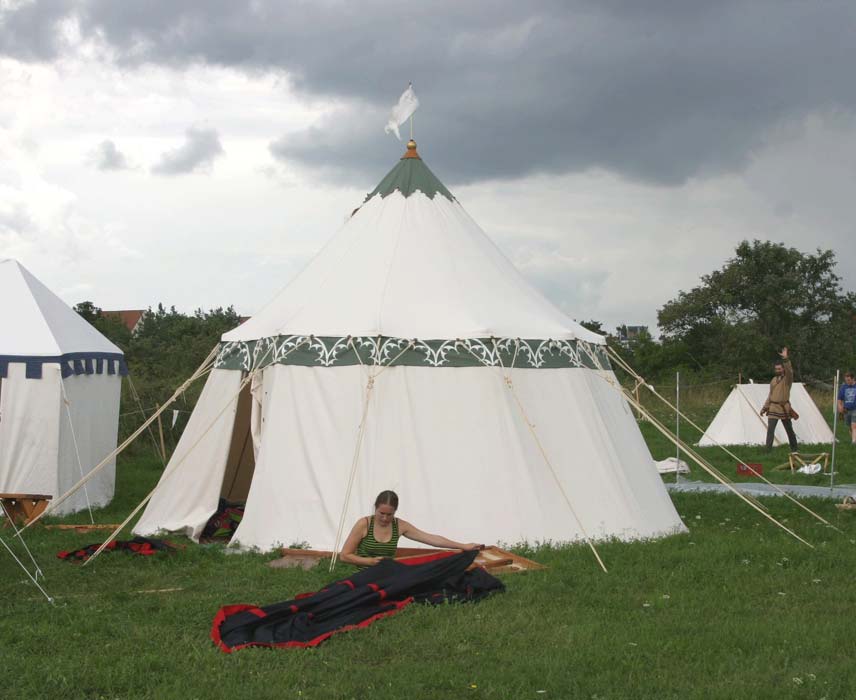
The next step is to make the walls. We divided the pavilion walls into 2 parts, it is practical to carry and nice to have two doors on a hot summer day. It also opens up other opportunities, to use the pavilion with only the roof is certainty a good thing on markets, but if the weather is windy a wall is nice to have along one side.
It’s important to make the walls fitting with the roof seams, so the wall pieces have the same width as the roof pieces in the top and gets wider a little downwards. Make a paper pattern before cutting.
Around the pavilion it gives 10 whole wall pieces, and to the two doors you will cut out 4 pieces of ¾ of the wall size. Doublecover like a double breasted coat.
Note this! The
straight edge to the slanting one! Like in the making of the roofsection.
Now you have two pavilionsides, with 5 whole wall pieces each, and in every
end a ¾ piece (a half door). Hem the edges al the way around.
To prevent draught make an earthcape. Sew a piece of cloth al around the bottom on the walls (not the door pieces ). Let the earthcape be at least 20 cm high, and sew it on the walls in a height of 10 cm so it will be 10 cm longer than the wall.
The frieze is in two pieces, and are sewed onto the roof with two seams, 3 cm apart (to get room for the buttons on the wall). It hangs down from the two seams, outside the frieze is 30 cm high and inside only 10 cm.
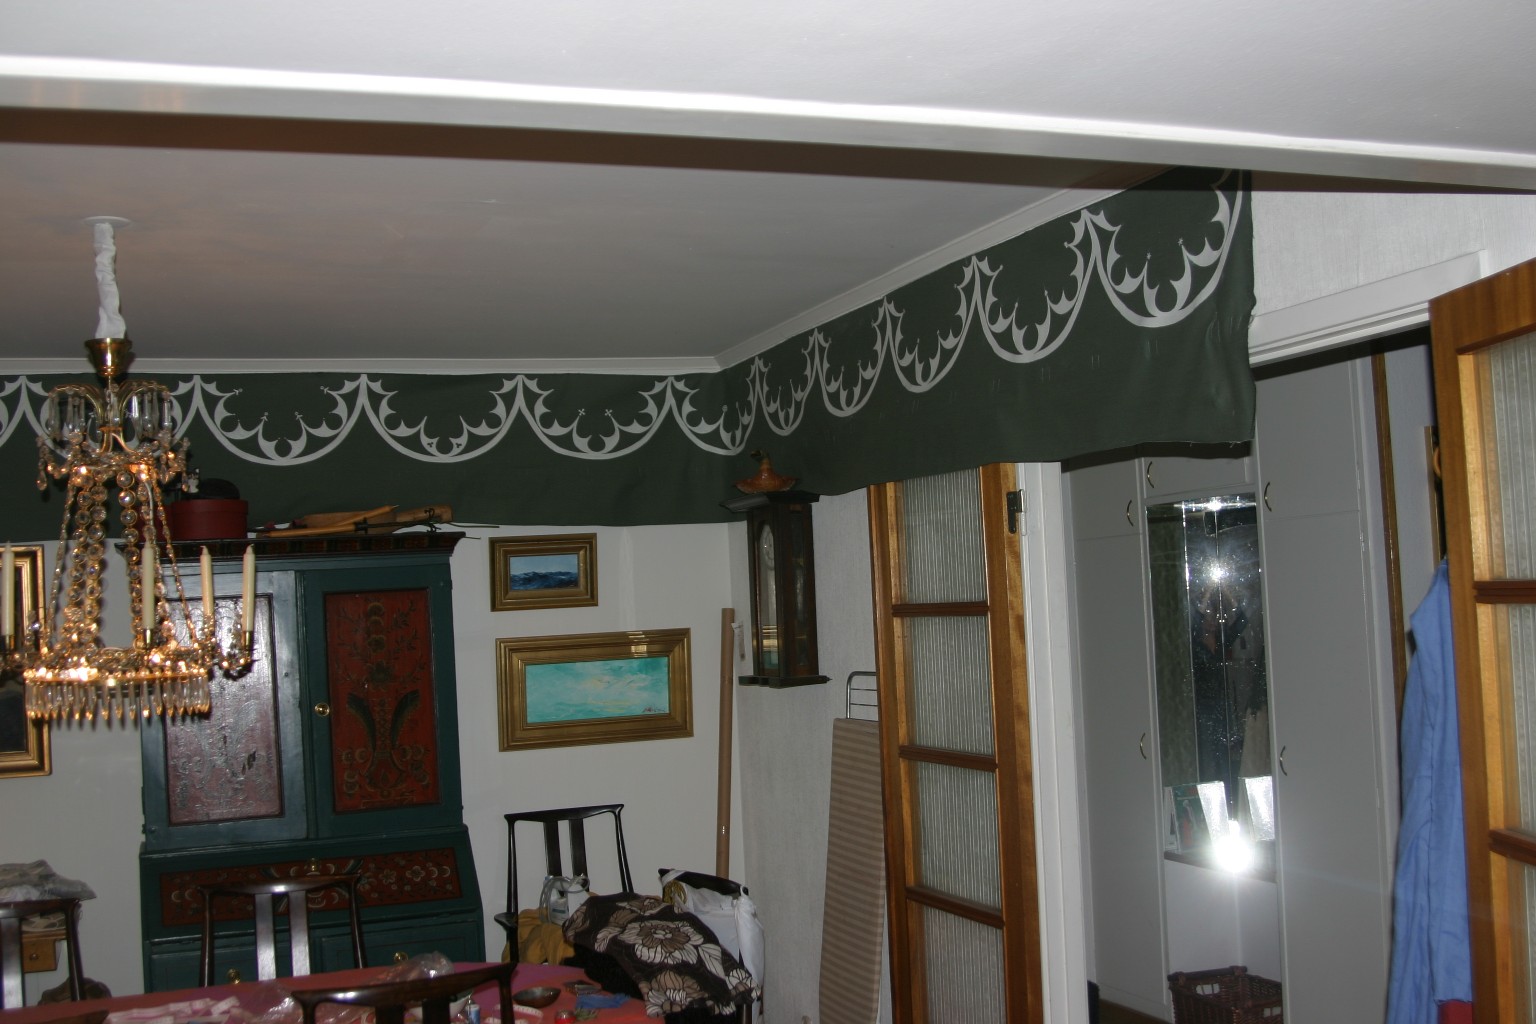
Sew the ribbon on the frieze al around, inside the short hanging piece. When you sew the ribbon, sew vertically two seams per button, where you want to button the wall onto the roof. We had 5 buttonholes per wallpiece. The holes shall only be wide enough to make your buttons go through. Be sure to use a tread in the same colour as the cloth otherwise its ugly from the inside, this sewing can be done beautifuller by hand, almost invisible from the inside of the pavilion.
Sew by hand the buttons on the walls, fitting the buttonholes on the frieze.
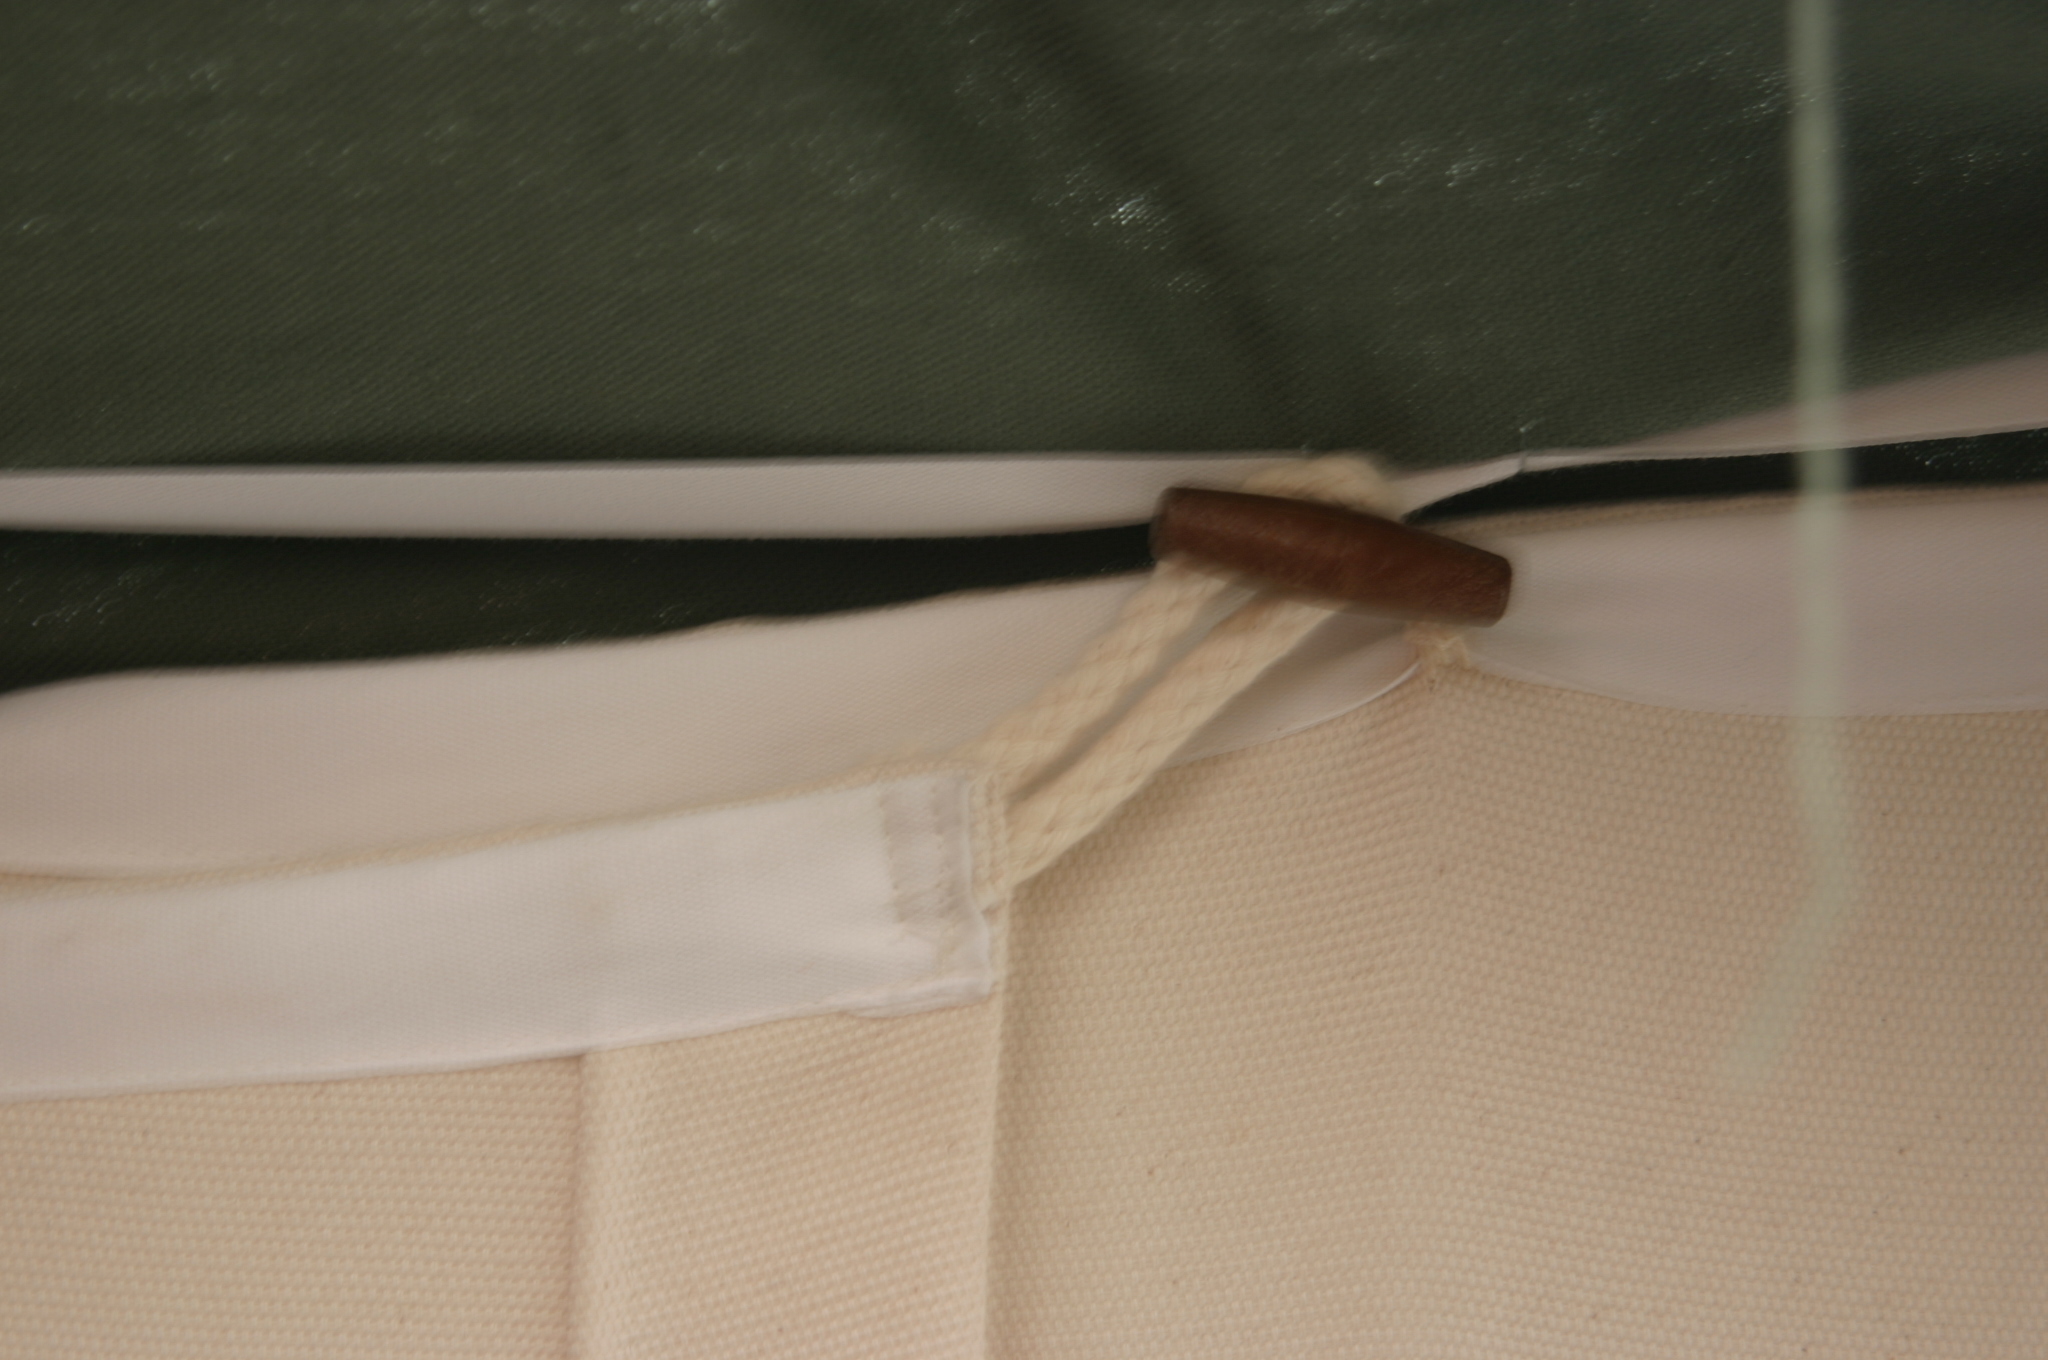
Before you finally try the pavilion out, make loops of the ribbon down on the wall to put the small tent pegs in. 5 loops a wall piece is enough
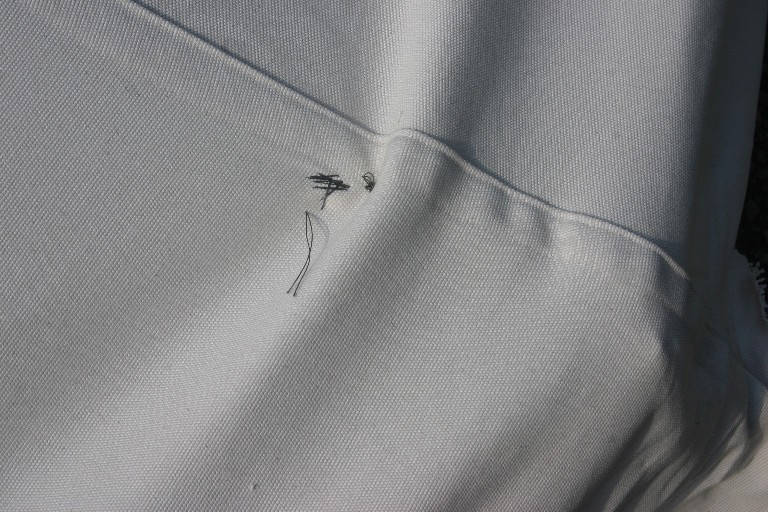
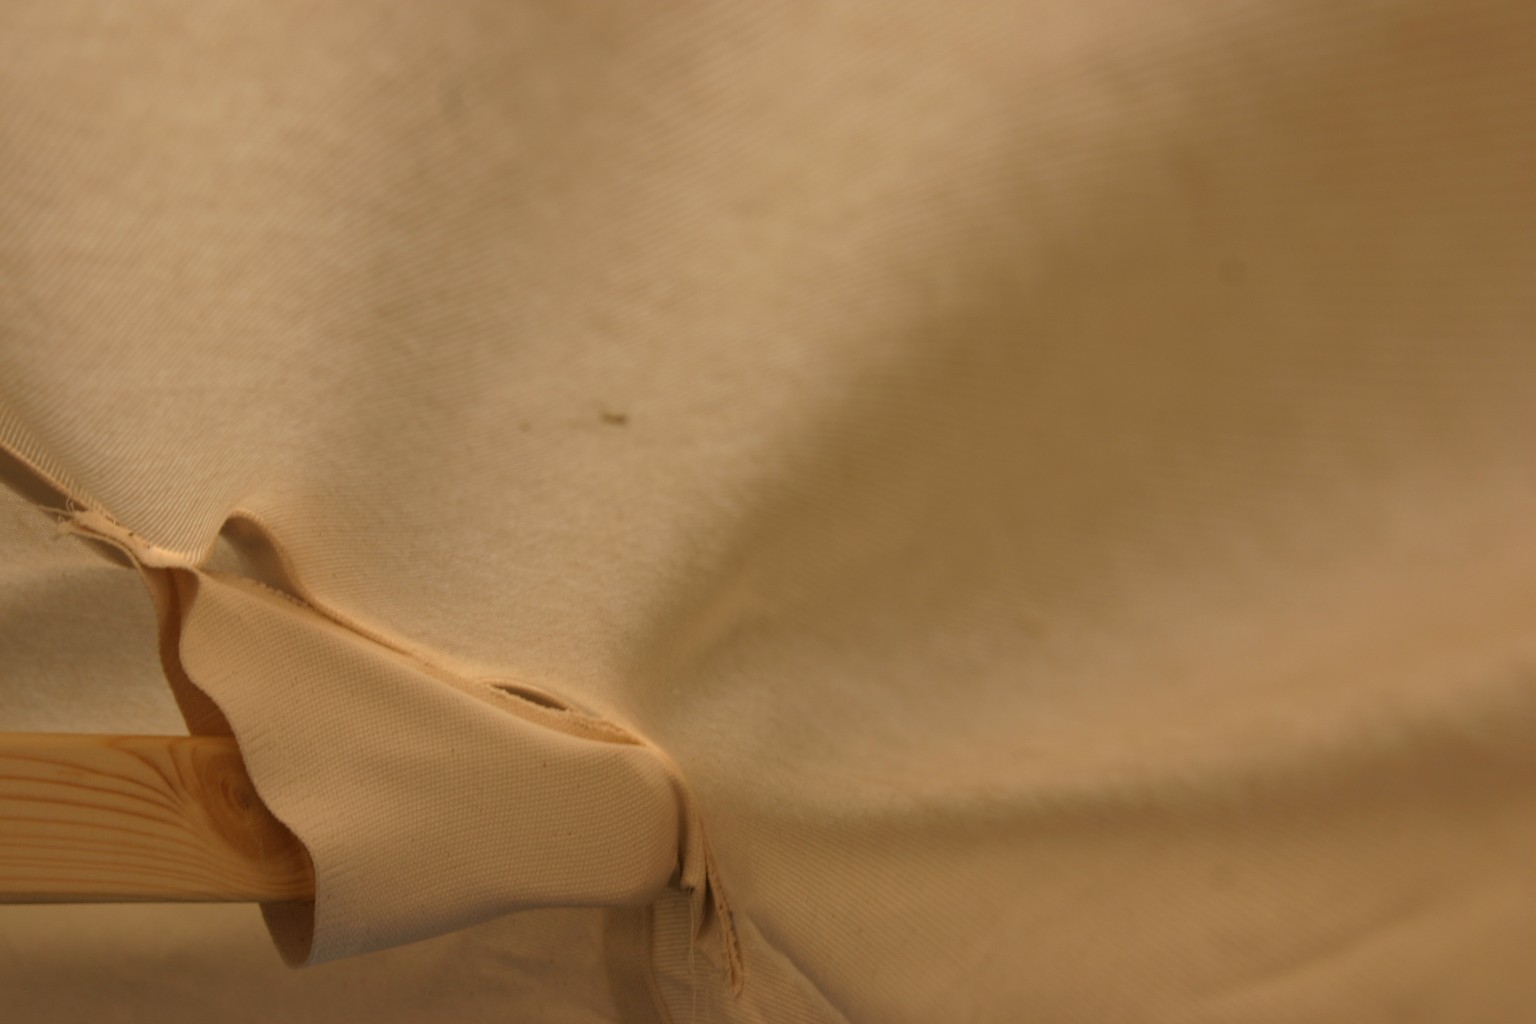
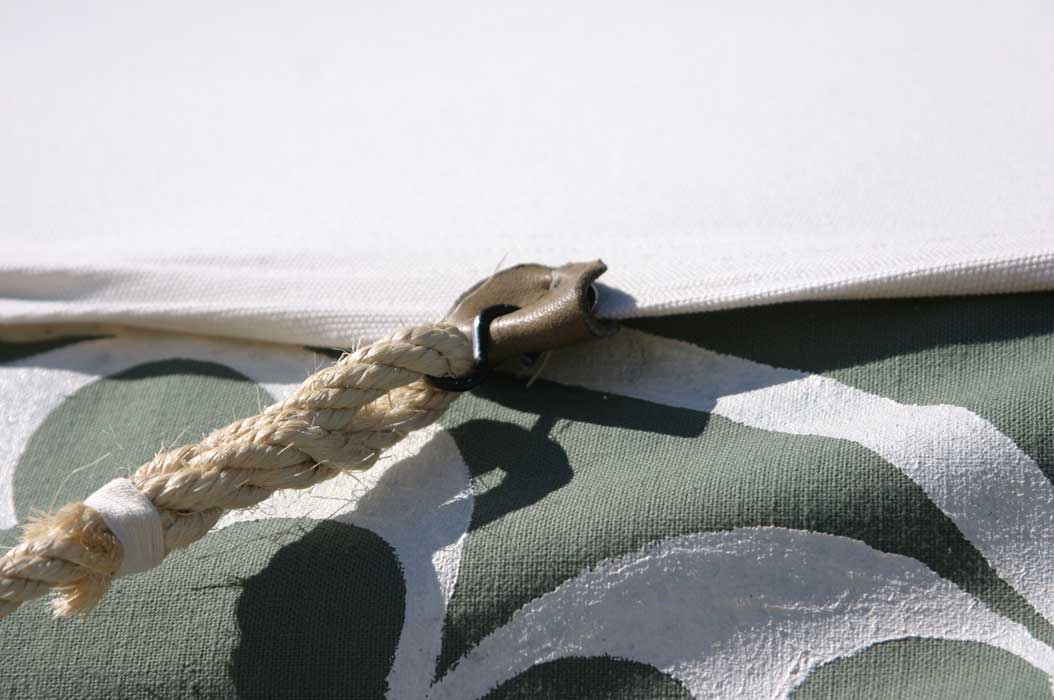
Make holes on the roofedge, thought the cloth and sew it to reinforce it. The first 12 holes right in the roofseam and as long in as the hooks reaches from the edge. Measure 30 cm at each side from the seamholes and make another hole, until you have 36 holes al around. Reinforce with strong tread and sew ironrings on top of the holes. Put a leaterwrap around the edge onto the hole,. Sew it to position with some stitches.
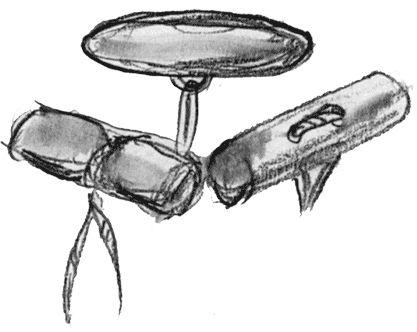
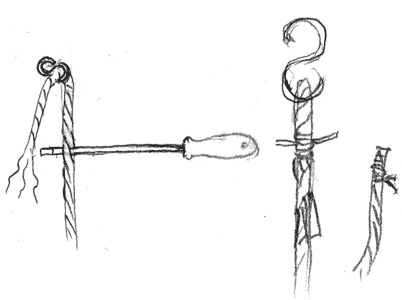
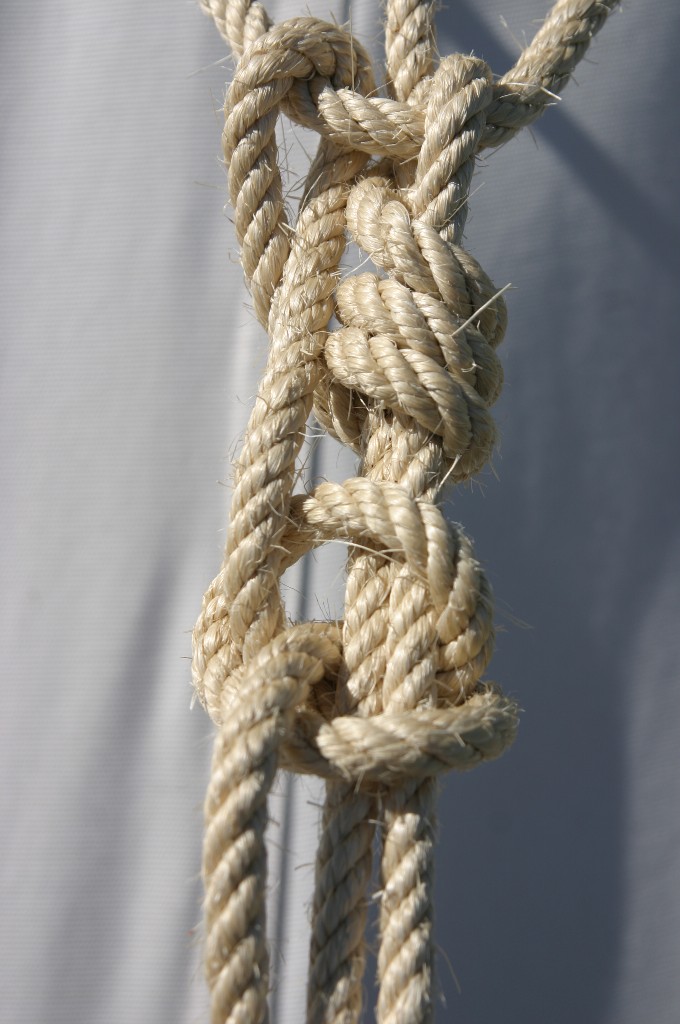
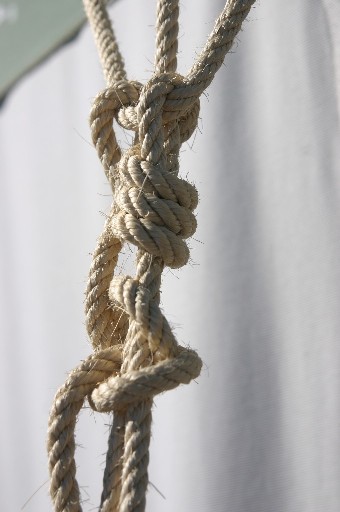
Splice the ropes in the hooks. Twelve 6 m ropes mounted with 1 hook each and twelve 2,5 m ropes with hooks in every end. Learn the “Dis-knot” before you proceed.
Plan the raising with placing the right number of a
roofpocket in front of the same number in the hub. Have the spokes ready but
not in the hub.
Mount the 36 ropes in the roofend.
To raise the centerpole with hub, roof and streamer mounted, we equipped the
centerpole with 4 ironloops
inside the pavilion just under the top, each in a different direction.
Through every loop a strong but light, rope is knotted. These ropes does the trick, when one person pegs the two of these ropes to the ground at the direction of “3 -” and “6 o’clock”, while the second person holds and raises the centerpole in position, the other pulls the two remaining ropes in direction of “10-“ to “11 o’clock” and peg them to the ground. Be sure if it’s blowing, it is in the winddirection you are raising first.
While one person holds the centerpole vertically, in its foot, the other carefully hooks the roof with the ropes and ties the pavilion roof to the ground in four directions. When it is done and safe enough the pole holder helps with the rest. Unleash the light rope and hide it out of the way, on top of the hub. The ropes will be useful when its time to take the pavilion down.
Mount the spokes, first in the hub at the right number and second to the pockets. If it’s too hard, continue to the next spoke and at last, let one person pull the rope carefully outside, while the other puts the final spokes into the pockets. Now its time to adjust the pole and the roof straight.
Button on the walls on the roof frieze and peg the walls into the ground.
Measure the remaining things; the doorbuttons and loops, 6 outside and 6 at the inside almost like a double-breasted coat. Hopefully this is the last construction thing to do on your pavilion if you already have made a hut to the rooftop.
The raising för the first time, measure placement of the door buttons remained
The first camp in Visby, packing up the bedcloth and the furnitures.
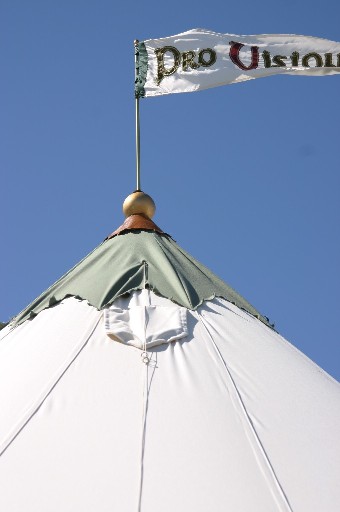
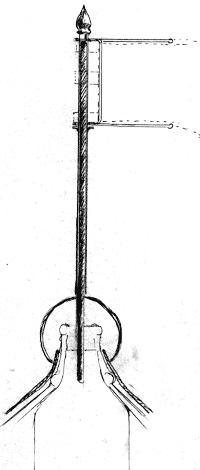
To top it all of, you can make a streamer with our favourite legend and embroider it. The streamer must be free to rotate otherwise you will soon have an odd knot on our rooftop. Put an 8 mm iron pole in the hole in the centerpole. Mount a hollow curtaintube on this pole, with a nice end and the streamer. Put some oil or smooth wax on the ironpole, and it will rotate without waking up your neighbours.
Make a nice leathercape to rest on the roof and above this, a pierced golden ball on the spear
Extra: A ventricle for letting out insects, bad air and smoke.
Cut a hole 15 cm x 20 cm, high up in a roofpart, reinforce it with ribbons vertical and horizontal and around the edges. Make the hatch a bit larger than the hole; sew in something heavy like lead in the bottomseam. Sew the hatch on the roof. To managing the ventricle from the ground outside, use a double string attacked to the bottom of the hatch, let one end get through a loop or a ring, a bit over the lock and hang down with a bead in the end. The other string goes through a loop quite under the hatch and hangs down with a bead in the end. Attach a button or a ring to fix the two loose ends at the managing height.
Remember to rainproof the pavilion!